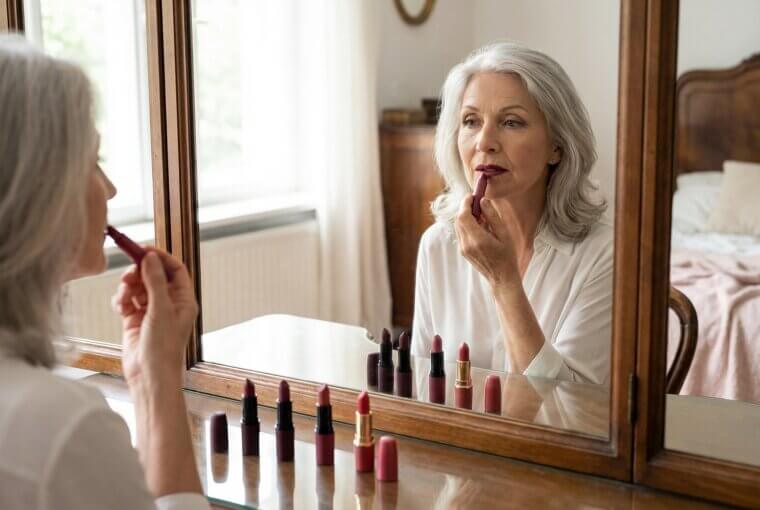
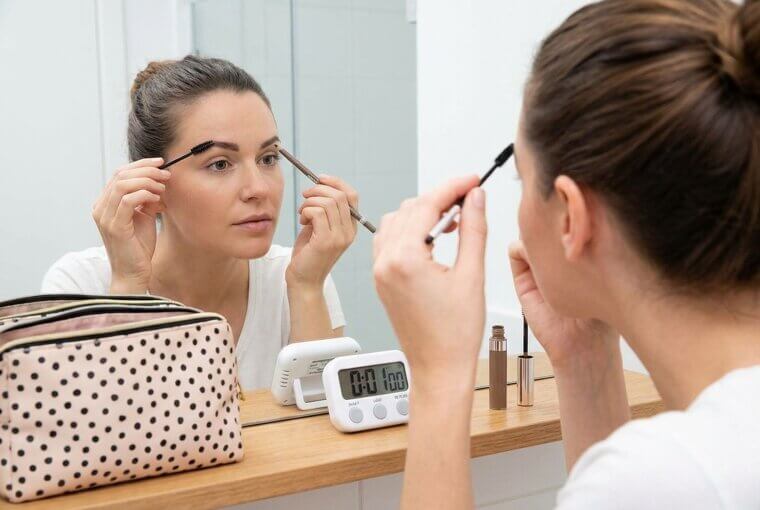
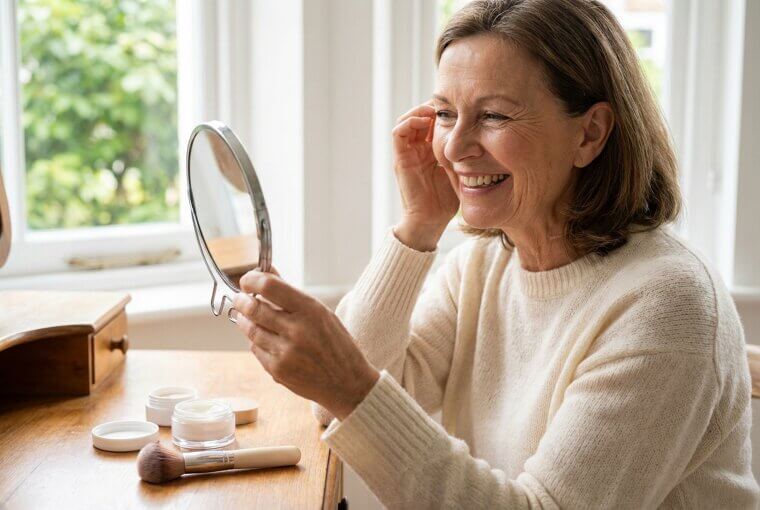
Your Makeup Routine Deserves an Update
You're not imagining it. The makeup routine that served you beautifully for years somehow looks different now — settling into places it never used to, feeling heavier by afternoon, looking slightly off in photos. Here's the reassuring truth: it's not you. After 60, skin genuinely changes. It becomes thinner, drier, and loses the texture that once held products seamlessly in place. The techniques that worked at 40 can quietly start working against you.
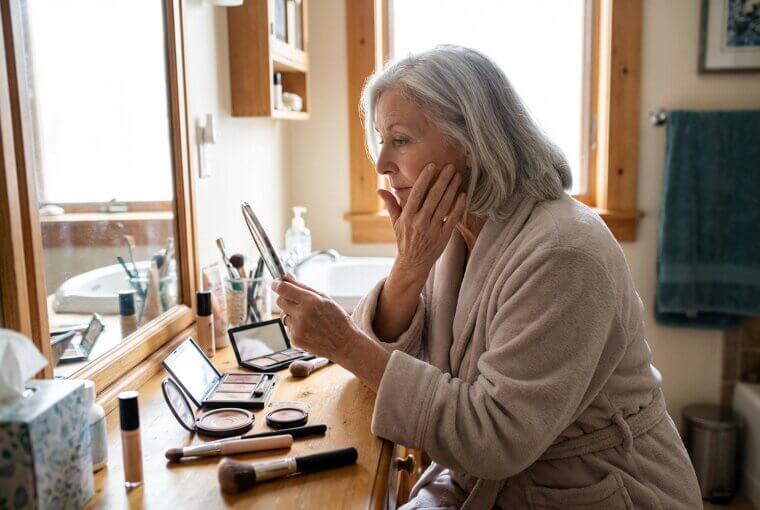
And there's one product hiding in nearly every makeup bag that might be the biggest culprit of all — powder. But before we get to that, there's something about your mirror you need to know.
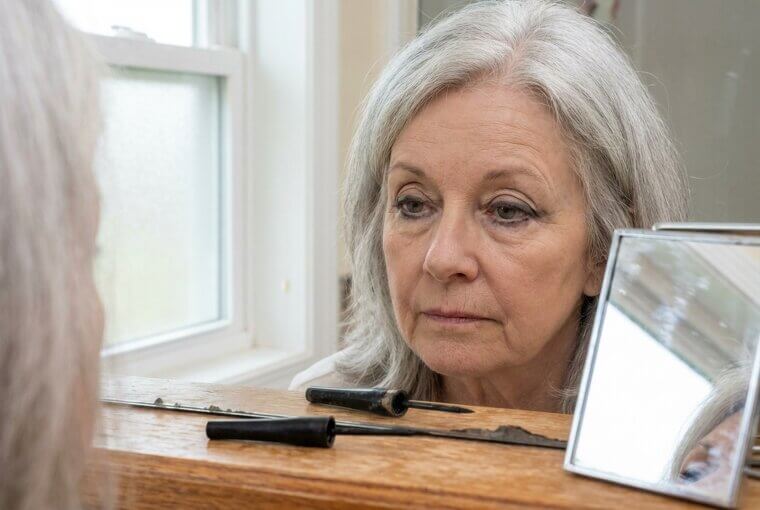
Why the Mirror Lies to You
Here's something almost every woman can relate to: you do your makeup in the bathroom, feel good about it, then catch your reflection in the car visor and wonder what happened. The problem isn't your skills — it's your lighting. Bathroom lights are either harsh overhead fluorescents that cast shadows or warm yellowish bulbs that hide everything. Neither one shows the truth. After 60, this matters more than ever because changes in skin texture become more pronounced under certain light.
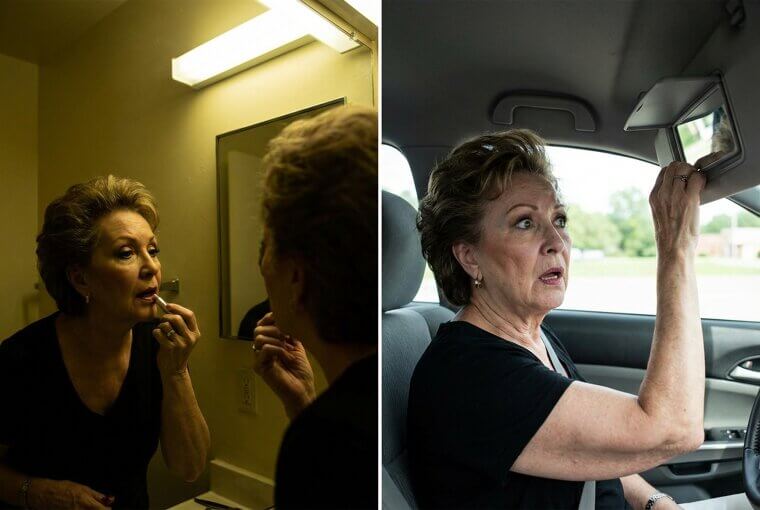
Natural daylight is the only honest mirror you have. Try checking your finished makeup near a window before you head out — you might be stunned by what you see. Keep that habit in mind, because we'll come back to it. First, though, let's talk about the foundation you've probably been loyal to for years.
Foundation That Looked Great at 45
If you've been reaching for the same full-coverage matte foundation since your forties, you're in very good company. It was the gold standard for years — flawless, even, dependable. But here's what's quietly changed: your skin no longer holds that product the way it once did. Heavy foundation now settles into fine lines around your mouth, creases along your forehead, and every bit of texture on your cheeks. It clings instead of blending.
There's also a good chance your skin tone has shifted over the past fifteen years — most women's does — which means that perfect shade match isn't so perfect anymore. The answer isn't more product. It's actually the opposite. And one everyday item in your makeup bag might be making things even worse.
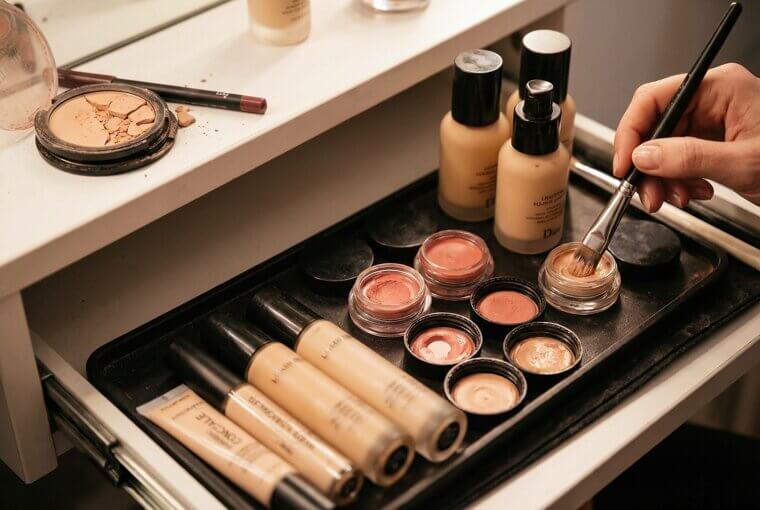
The Powder Trap Almost Everyone Falls Into
That everyday item we've been hinting at? It's your pressed powder compact — and it might be the single most aging product you own. Here's what nobody tells you: after 60, setting powder clings to the fine peach fuzz on your cheeks and jawline, settles into every line on your forehead, and creates a flat, chalky finish that strips away all the natural dimension your face still has.
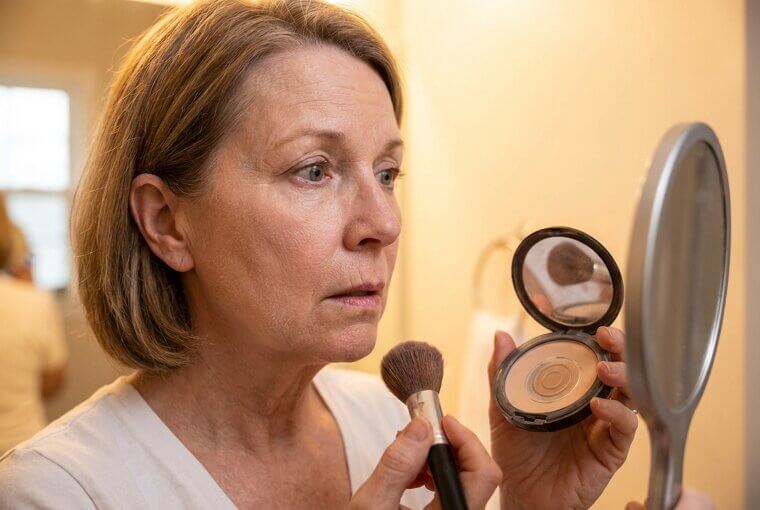
Most women reach for it out of pure muscle memory — a habit built over thirty or forty years. But the skin that once wore powder beautifully now announces it. So what are the professionals actually using instead?
What Makeup Artists Quietly Stopped Using
Here's what the pros know that most women don't: makeup artists who work with mature clients quietly purged their kits years ago. Powder foundation, heavy under-eye concealer, dark lip liner — all gone. In their place? Cream and liquid formulas across the board. The reason is simple. Powder sits on top of skin. Cream melts into it. After 60, that difference is everything. Products that move with your skin instead of fighting it create what professionals call a "skin-like finish" — where makeup looks like
your actual face, just elevated. That phrase — skin-like finish — is worth remembering, because it's the standard we'll measure every tip against from here on. So what's the very first swap you should make today?
Try This One Simple Swap Today
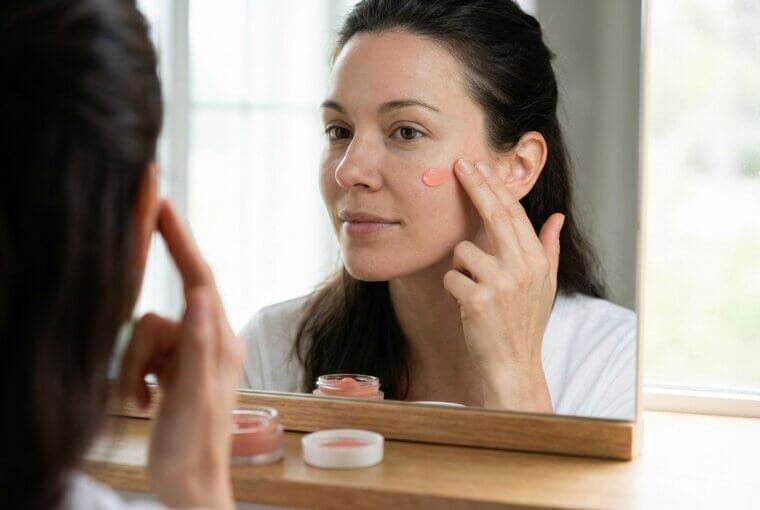
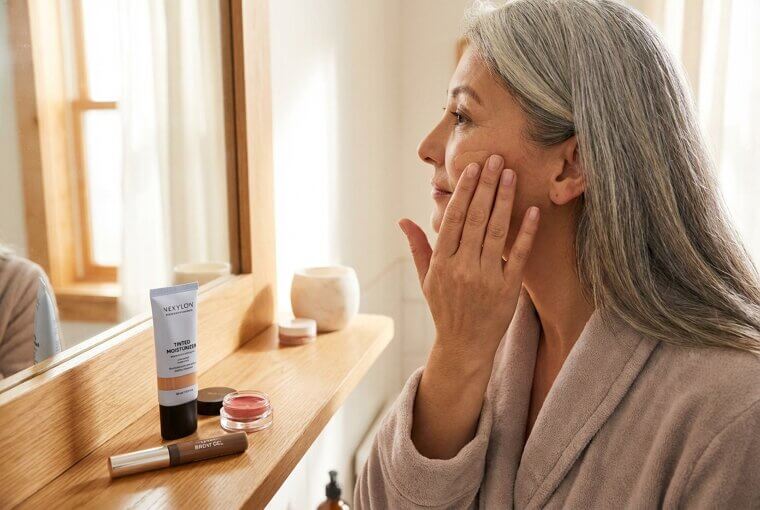
Here's your move: next time you're at the drugstore, look for a tinted moisturizer or skin tint. Check the label for words like "hydrating," "dewy," or "sheer coverage." Skip anything that says "matte" or "full coverage." That's it — that's your new foundation. Now here's the application secret that makes it work: use your fingers. The warmth of your hands helps the product melt into your skin instead of sitting on top of it. Smooth it across your cheeks, forehead, and chin the same way you'd apply moisturizer.
You'll notice something immediately — your skin looks like skin again, not like a mask. That "skin-like finish" the pros aim for? This is how you get it. One swap, two minutes, visible difference today. But there's another product in your bag that's quietly undoing your hard work every single morning.
Dark Under-Eye Concealer Backfires Badly
Here's the twist nobody expects: that concealer you're carefully layering under your eyes is actually making dark circles more noticeable, not less. Within an hour of application, heavy concealer creases into every fine line beneath your eyes, creating tiny visible ridges that catch light in all the wrong ways. Worse, thick coverage creates an obvious contrast — a pale, cakey patch surrounded by natural skin — that draws the eye straight to the area you're trying to hide.
The counterintuitive truth? A slightly visible dark circle with barely-there coverage actually looks years younger than a crease-filled concealer job. Perfection isn't the goal — the wrong kind of perfection ages you faster than the imperfection ever could. So what do the pros actually use instead?
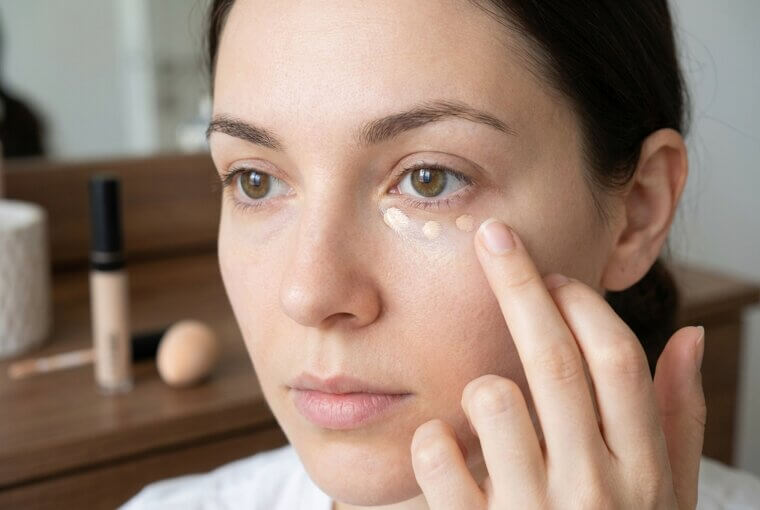
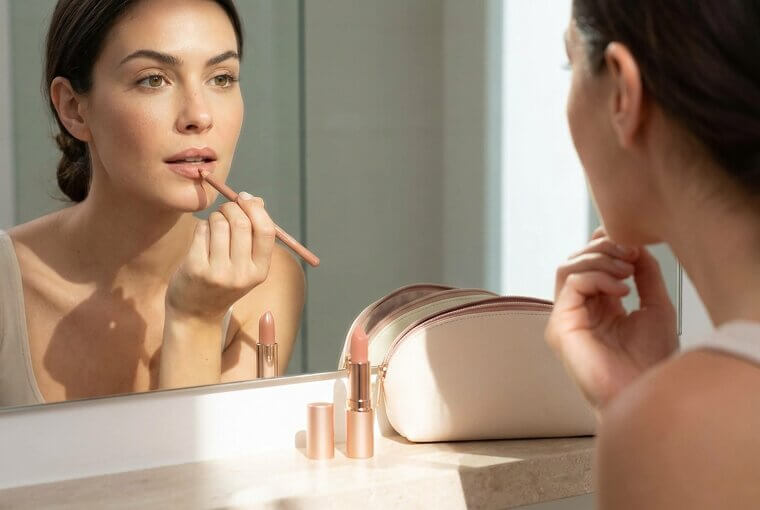
The Real Trick for Brighter Eyes
Here's exactly what to do instead. Pick a hydrating, light-reflecting concealer — just one shade lighter than your skin tone, no more. Dab three tiny dots in an inverted triangle under each eye, point facing down. Now here's the key: pat it in using your ring finger. Why that finger specifically? It naturally applies the least pressure of any finger, so you're blending without dragging or tugging delicate under-eye skin. Gentle tapping motions only — never rub. The product should melt in, not smear across.
Now remember our powder rule? Here's the one exception: a tiny dusting of finely milled translucent powder only on the under-eye area prevents creasing without the chalky effect. Everywhere else stays powder-free. But your eyes are only half the story — what's happening with your lipstick might be aging you just as fast.
Matching Lipstick to Your Decade
If you've been wearing bold lipstick since your twenties, it's part of who you are — and nobody's asking you to give that up. But here's what changes after 60: very dark shades and ultra-matte formulas start working against you. They make lips appear thinner than they actually are, and every vertical lip line becomes a tiny canyon where color bleeds and settles. The shade you love isn't the problem. It's the formula and the finish that need rethinking.
You can absolutely still wear a gorgeous red or a rich berry — the secret is choosing the right texture. And that distinction makes a bigger difference than most women realize.
Why Matte Lipstick Adds Ten Years
Within sixty minutes of applying matte lipstick, something unforgiving happens. The formula actively pulls moisture from lips that are already producing less natural oil than they did twenty years ago. The result: visible cracks, deep vertical lines filled with pigment, and lips that look paper-thin. And this is exactly what people see first during face-to-face conversation. Think about the last family photo you took — the ones with grandchildren clustered around you, everyone smiling.
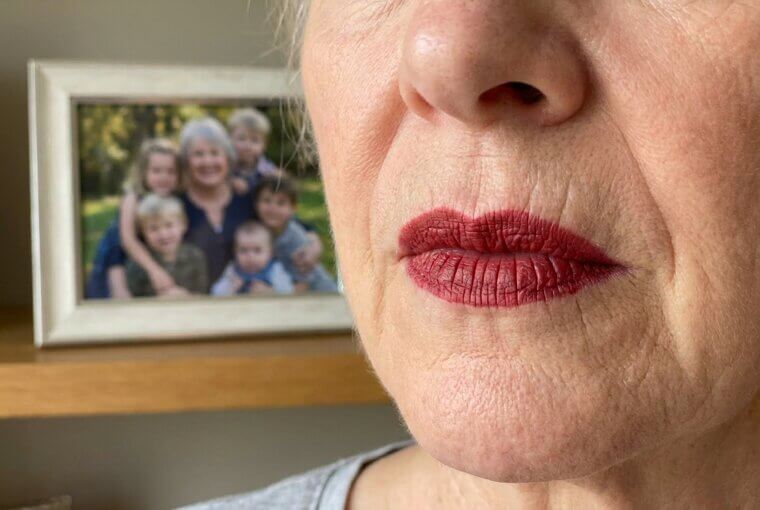
Your lips are front and center in every single frame. Matte formulas don't just dull color — they shrink the appearance of lips that have already lost volume naturally. It's one of the fastest-aging effects in any makeup bag. The good news? There's a two-second fix that completely reverses this effect.
A Two-Second Lip Fix That Works
Here's your new lip routine — it takes seconds. First, grab a lip liner that matches your lipstick shade exactly. Not darker, not contrasting — matching. Trace your natural lip line with light, short strokes to define the shape and create a barrier that prevents color from bleeding into those fine lines. Next, fill in your entire lip with a creamy, satin-finish lipstick. The hydrating formula keeps lips looking plump instead of parched.
Now the magic touch: dab a tiny drop of clear gloss right on the center of your lower lip. Just the center. This catches light and creates the illusion of fuller, younger-looking lips instantly. Try it right now — you'll see the difference immediately in a mirror. But lips aren't the only feature where placement matters more than product. Where you put your blush might be quietly working against you too.
Blush Placement Changes Everything After 60
Here's something that might make you rethink a lifelong habit. That classic advice — smile and sweep blush onto the apples of your cheeks? After 60, it's actually dragging your face downward. When skin shifts with age, the apples of your cheeks sit lower than they used to. Placing color there draws attention down, creating a heavier, more tired appearance. It's the opposite of what you want.
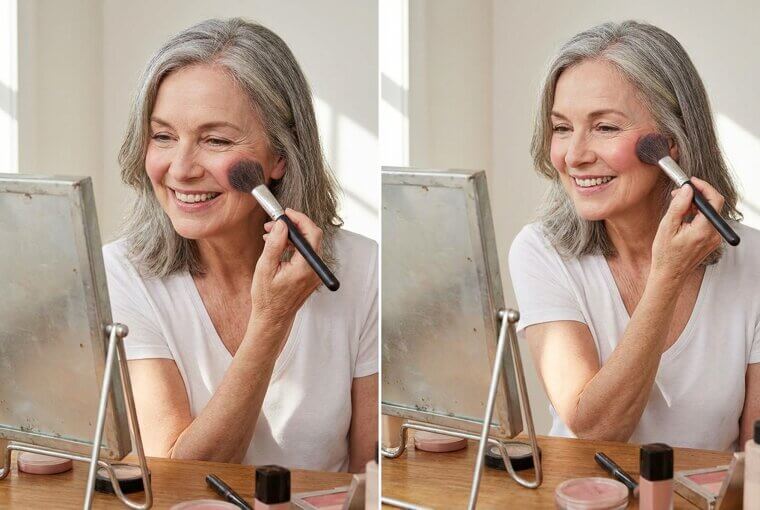
The fix is surprisingly simple: move your blush higher. Apply it along the cheekbone itself, sweeping gently upward toward the temple. This creates an instant visual lift that mimics where youthful fullness naturally sits. But the product you use matters just as much as where you put it.
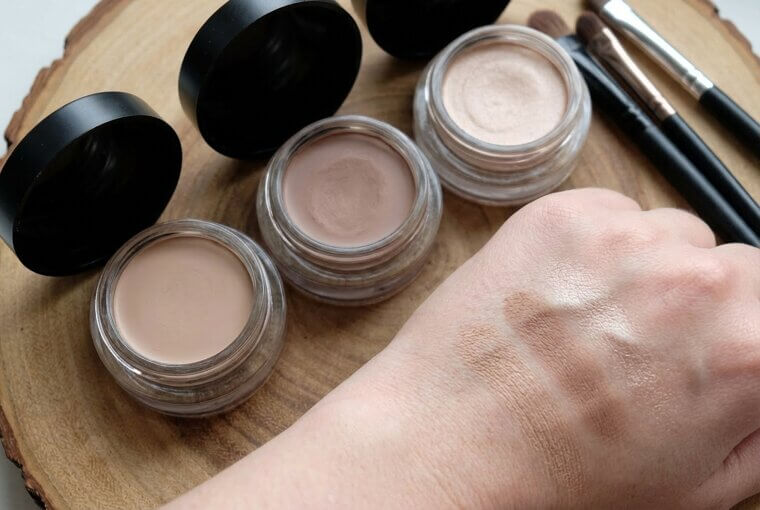
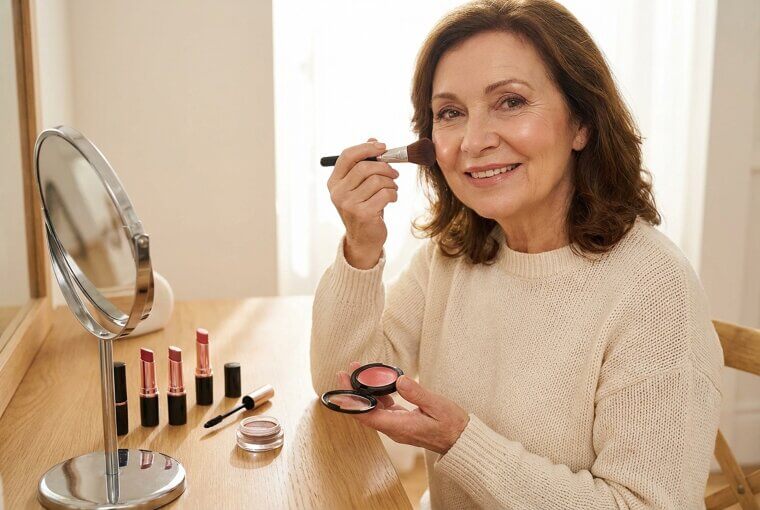
Cream Blush Is Your Secret Weapon
Here's what professionals working with mature clients know: cream blush isn't just a preference — it's practically unanimous among makeup artists. Powder blush sits on top of skin, clinging to every bit of texture and dryness. Cream blush actually melts into the skin, creating that coveted "lit from within" glow that looks like natural radiance rather than applied product. Remember how tinted moisturizer works best applied with your fingers? Same principle here. Your fingertips warm the cream formula and press pigment directly into the skin, where it becomes part of your complexion instead of a visible layer sitting on the surface.
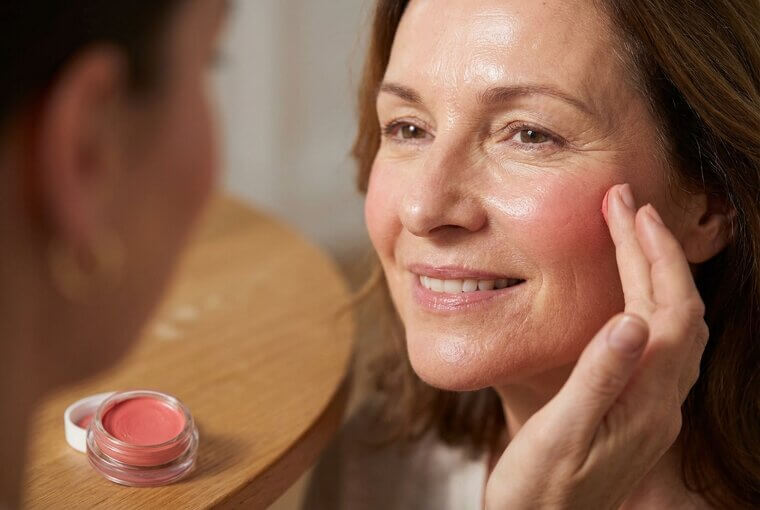
The result is a flush that looks like it's coming from within — like you just stepped in from a brisk walk. No streaks, no powder patches, no chalky finish. Now let's put placement and product together into a simple technique you can master in thirty seconds flat.
Smile and Tap It On — Here's How
Here's your step-by-step technique. Smile gently — just enough to feel where your cheekbone rises highest. That's your starting point. Now relax your face completely. Dab a small dot of cream blush on that high point, then use your ring finger to tap — never drag — the color along the cheekbone toward your hairline. Three to four light taps blending upward is all you need. Now here's the confidence check: step to that window and snap a quick selfie in natural daylight.
You should see a soft, lifted flush that looks like it belongs there. If it looks too low, tap it higher next time. Simple as that. But while your cheeks are glowing, there's another feature quietly fading — and ignoring it might be costing you more than you realize.
The Eyebrow Mistake That Erases Your Face
Here's a fact that surprises almost everyone: eyebrows have more impact on how old you look than any other single feature. More than foundation, more than lipstick, more than concealer. After 60, brows naturally thin and fade, and most women fall into one of two traps — either over-drawing them with a heavy pencil that looks painted on, or skipping them entirely and letting the face lose its structure.
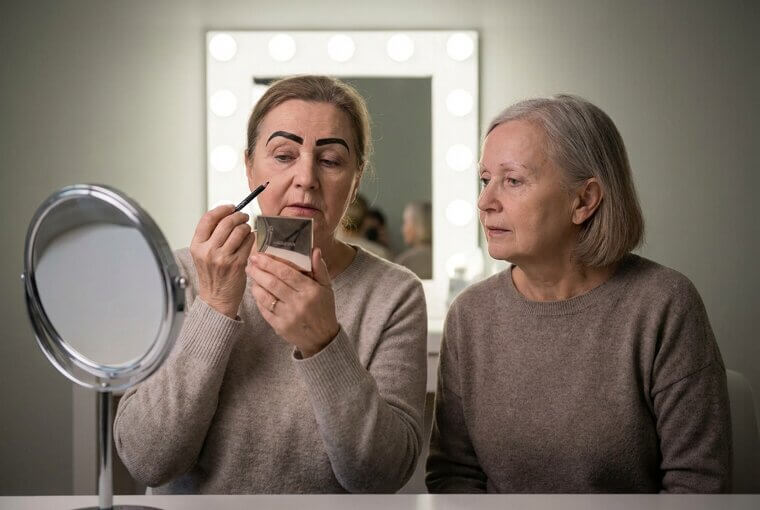
Getting your brows right can genuinely take five to ten years off your appearance without changing anything else. That's not exaggeration — it's what makeup artists see every single day. So why do so many women get this wrong? It comes down to one outdated technique almost everyone was taught.
Pencil Lines vs. Natural Hair Strokes
Here's the insider difference: professionals never draw a single solid line across the brow. Instead, they use a fine-tipped pencil held at an angle, making tiny feathery strokes that mimic individual hairs. Each stroke follows the natural direction your brow hair grows. The result looks like real brows, not a drawn-on arch. And here's the shade rule that surprises most women — go one to two shades lighter than you think you need. Darker brows against mature skin look instantly harsh and artificial.
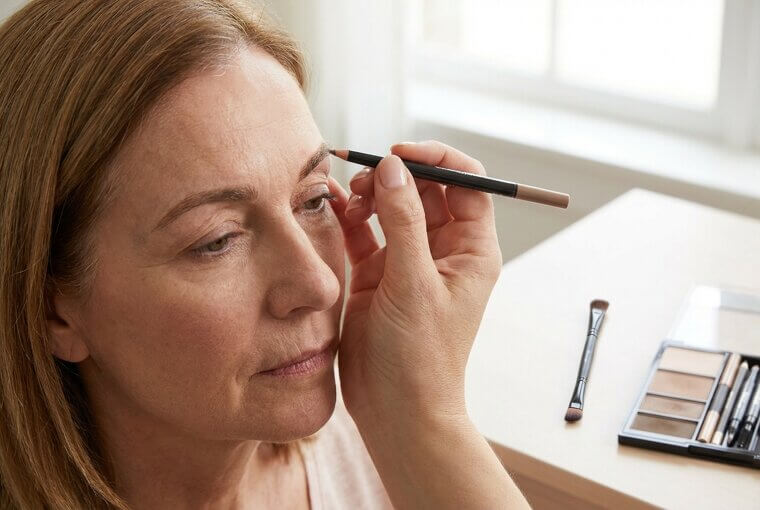
The easiest professional shortcut? A tinted brow gel brushed through your existing hairs. It adds color, fullness, and hold in literally five seconds — no drawing required. Think of it as mascara for your brows. Now let's put this all together into a complete one-minute brow routine you can time on your phone.
Fill Your Brows in Under One Minute
Grab your spoolie and a fine-tipped pencil — set a timer if you want. First, brush brow hairs upward with the spoolie. This reveals exactly where the sparse spots are. Now, using those light hair-like strokes from the last section, fill only those gaps. Three to five small strokes per brow is usually plenty. Resist the urge to keep going. Next, sweep a tinted or clear brow gel through both brows to set everything in place.
Now the most important step: stand at arm's length from your mirror. Brows are meant to be seen from across a room, not two inches away. If they look soft and natural from that distance, you're done. The whole thing takes under sixty seconds. Next up — another feature that's quietly gotten trickier after 60, and it's probably smudging on you right now.
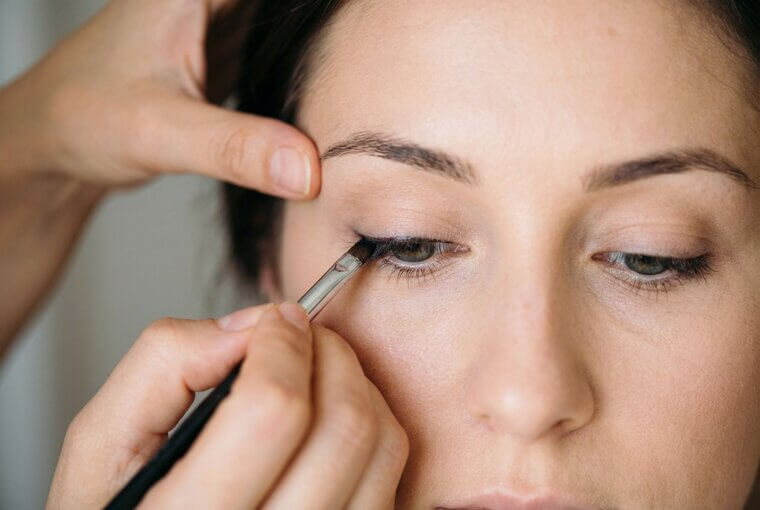
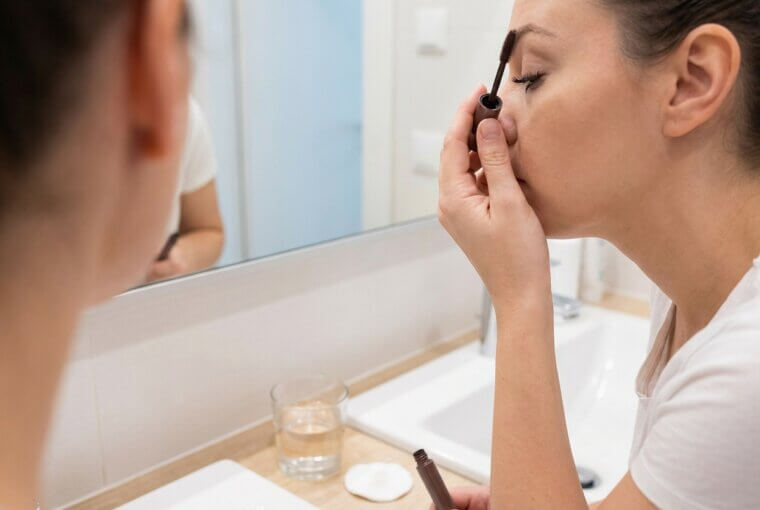
Eyeliner Gets Trickier — Here's Why
If your eyeliner looks perfect at 8 a.m. and has vanished or smudged into your crease by noon, you're not buying bad products. Your eyelid skin has changed. After 60, lids thin and lose elasticity, producing more oil in the fold. Black liquid liner transfers onto hooded skin within hours, creating shadowy smudges that make eyes look tired and heavy. Worse, a thick line on a drooping lid actually shrinks your eyes visually — the opposite of what you want.
This is one of the most visibly aging makeup mistakes out there, and it's incredibly common because the same technique worked beautifully for decades. The good news? Professionals have a completely different approach that solves every one of these problems.
The Tight-Line Trick Professionals Swear By
Here's what makeup artists do instead: they tight-line. Rather than drawing a visible stripe above your lashes, they press a soft pencil or gel liner directly into the spaces between lash roots. You're literally filling the gaps where skin peeks through, right at the waterline and lash base. The effect is remarkable — your lashes suddenly look twice as thick, but nobody can see any liner. It looks completely natural.
One more professional secret: skip jet black. After 60, dark brown or espresso shades define your eyes just as beautifully without that harsh contrast against your skin. The look is modern, soft, and effortlessly polished. Now, about shimmer eyeshadow — the advice you've heard might be only half right.
Shimmer Eyeshadow: Friend or Foe?
Here's something that might surprise you: you don't have to give up shimmer entirely. That blanket advice to avoid all sparkle after 60? It's only half right. There's a crucial difference between shimmer and frost — and it changes everything. A subtle champagne or soft gold shimmer dabbed on just the inner corner of your eye actually brightens your whole face and makes eyes look wider and more awake.
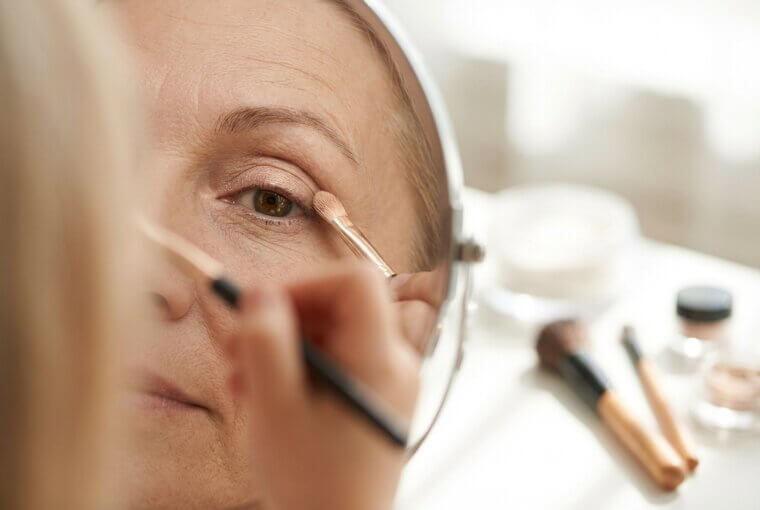
What truly ages you is frosty, glittery, or metallic shadow spread across the lid. Those formulas grab onto every fold and texture, magnifying exactly what you'd rather soften. So keep your sparkle — just be strategic about where it goes. Next, let's simplify your entire eyeshadow collection down to three essential shades.
Three Eyeshadow Shades You Actually Need
You don't need a massive palette — just three shades. First, a matte neutral that closely matches your skin tone for the entire lid. Second, a slightly deeper matte shade blended into the crease to create soft dimension. Third, that subtle satin shimmer we just discussed for the inner corner and brow bone. Here's the key: choose cream formulas over powders. Cream shadows glide onto mature lids without settling into creases or looking chalky.
Apply with your fingertips or a small brush, blending edges so nothing looks harsh. The warmth of your fingers actually melts cream shadow into skin beautifully — the same principle as your tinted moisturizer and blush. Three shades, two minutes, done. But even perfect eyeshadow can be undone by one stubborn problem lurking just below your lashes.
The Mascara Habit That Clumps and Flakes
You've carefully applied your concealer, blended your shadow beautifully — then by lunchtime, tiny black specks have scattered under your eyes, settling right into those creases you worked so hard to conceal. Sound familiar? That's flaking mascara undoing everything. Here's why it happens: thinner, lighter lashes after 60 tempt you to pile on multiple coats of thick volumizing mascara, chasing the fullness you remember. But each additional coat doesn't add volume — it adds weight, clumping, and those dreaded spider lashes that look harsh even from across the room.

The real cost is bigger than clumpy lashes. Flaking mascara migrates downward all day, turning your carefully blended under-eye area into a smudgy, tired-looking mess. One product literally sabotages three others. But there's a specific type of mascara formula that completely eliminates this problem — and it changes the game.
One Coat Done Right Beats Three Done Wrong
Here's your fix: switch to a tubing mascara. Unlike traditional formulas, tubing mascaras wrap each lash in tiny polymer tubes that never flake, smudge, or migrate into your under-eye area. When you're ready to remove them, warm water makes them slide off cleanly — no rubbing, no raccoon eyes. Look for "tubing" or "lengthening" on the label and skip anything marked "volumizing." Apply just one coat. Wiggle the wand gently at the base of your lashes, then sweep upward slowly to the tips.
That single careful coat will give you defined, separated lashes that stay put all day long. If you've spent years battling midday smudges, this switch will feel like a small miracle. But here's something most women don't realize — what you do *before* applying any makeup matters even more than the makeup itself.
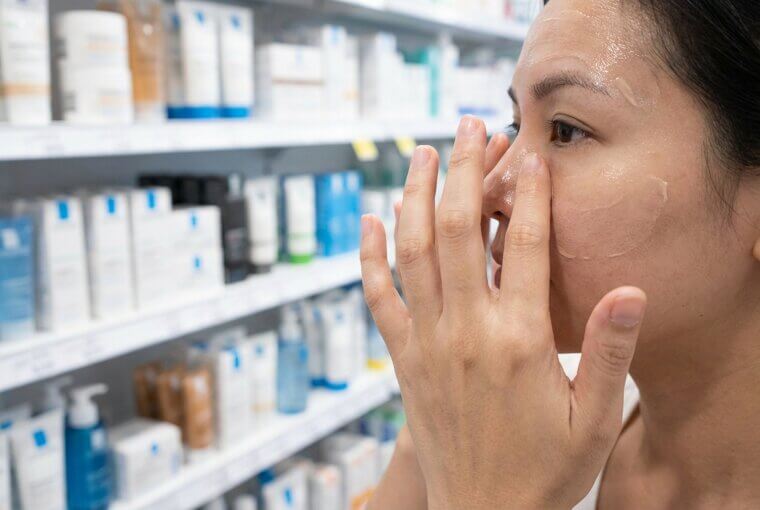
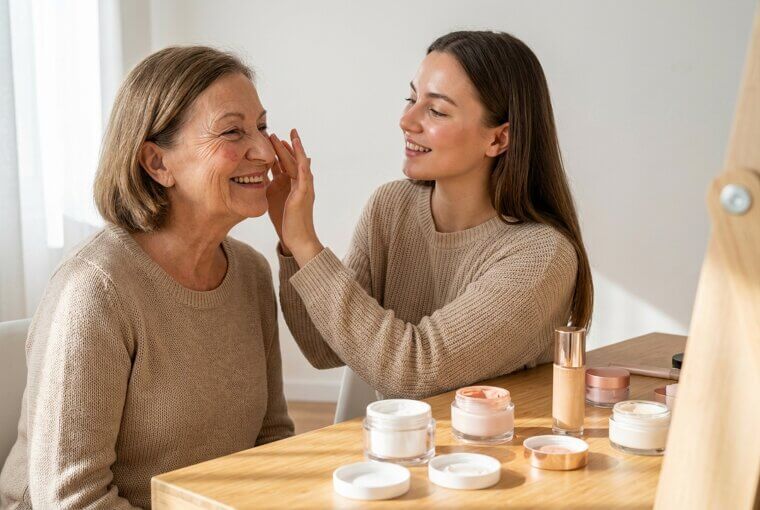
Skincare Is Makeup Now — Why Prep Matters
Here's the counterintuitive truth: after 60, your skincare routine matters more than your makeup. Professional makeup artists working with mature clients spend roughly seventy percent of their time on skin prep and only thirty percent on actual application. That ratio shocks most women, but it explains everything. A hydrating primer or two drops of facial oil applied just two minutes before your tinted moisturizer transforms how every single product sits on your skin. It fills in texture, prevents patchiness, and creates that coveted "skin-like finish" that no foundation can achieve alone.
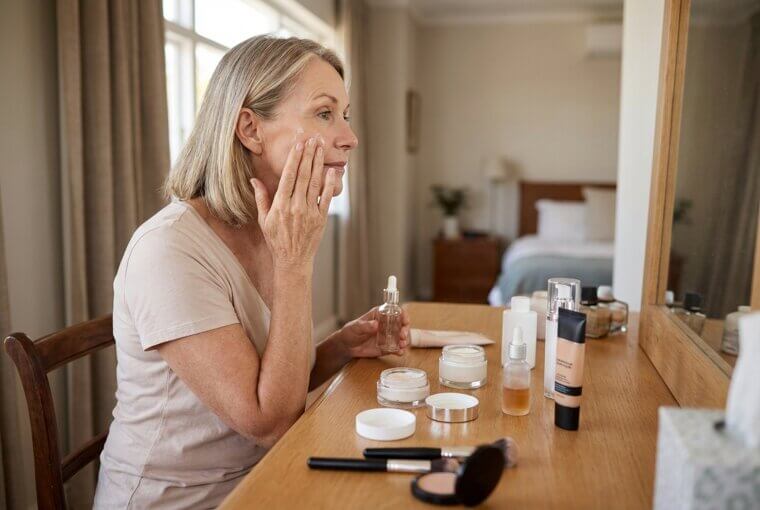
Think of it this way — you wouldn't paint a dry, cracked wall without priming it first. Your face deserves the same logic. The makeup hasn't been the problem. The canvas has. And the perfect prep routine takes just ninety seconds.
A 90-Second Prep That Changes Everything
Here's your exact routine. Step one: apply your regular moisturizer and let it sink in for sixty seconds. Don't rush this — that minute lets hydration actually absorb rather than sit on top. Step two: apply a silicone-free hydrating primer. Silicone-based primers can pill and ball up on drier mature skin, so look for water-based or glycerin-based formulas instead. Don't have primer? Mix one single drop of facial oil into your tinted moisturizer right in your palm.
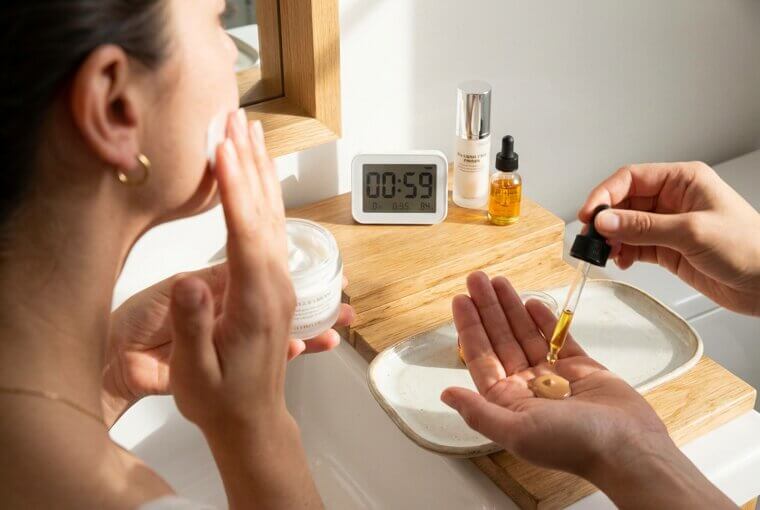
That's it. Ninety seconds, and you've created a smooth, dewy canvas that makes every product you apply afterward blend easier, look more natural, and last hours longer. You'll wonder why nobody told you sooner. Now — about that phrase "less is more" that everyone loves to repeat after 60? It doesn't mean what you think.
The "Less Is More" Myth — Decoded
Here's what nobody tells you: "less is more" was never meant to mean "barely wear anything." That interpretation has convinced countless women over 60 to slowly erase themselves — skipping lipstick, ditching blush, fading into the background. That's not wisdom. That's disappearing. The real meaning? Use fewer heavy, powder-based, drying products — and replace them with the right formulas. Cream textures. Satin finishes. Strategic placement. You can absolutely wear lipstick, blush, eyeshadow, and mascara every single day.
The goal was never fewer products. It was smarter ones. You deserve to walk into a room and feel like yourself — vivid, expressive, fully present. Aging doesn't mean dimming your light. Now, there's one final daily habit that ties all of this advice together — and it takes about five seconds.
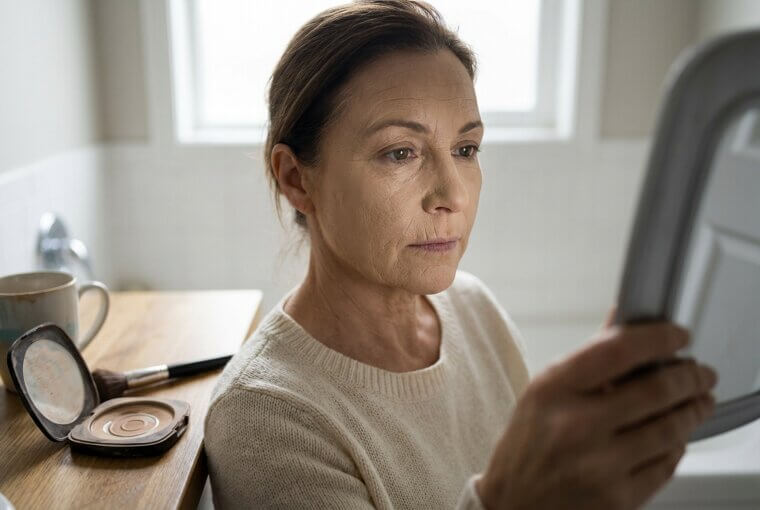
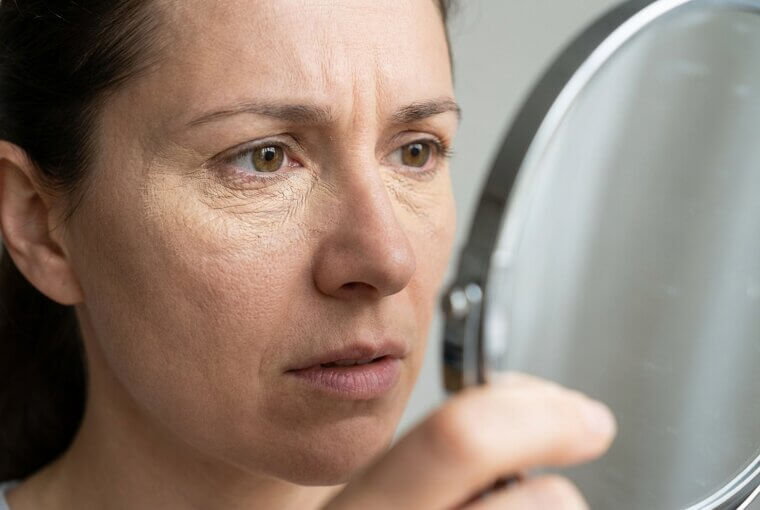
Check Your Makeup in Daylight — Always
Here's the five-second habit that makes everything else work: before you walk out the door, step to a window and look at your face in natural daylight. Every single time. This is where heavy powder reveals itself. Where concealer creases become visible. Where foundation that looked perfect in your bathroom suddenly doesn't match your neck. Daylight is the only honest mirror you have. Keep a small hand mirror right by your front door, near the closest window or on the porch.
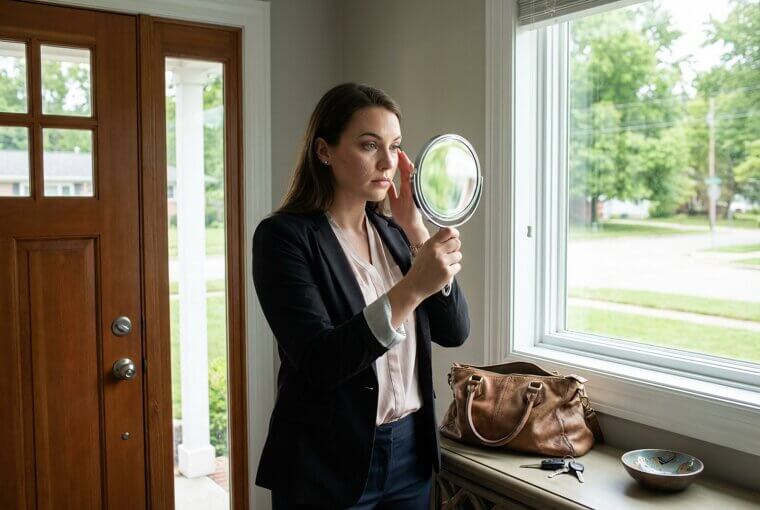
One quick glance, and you'll catch what artificial lighting hides. You can blend, blot, or soften anything in seconds before it follows you out into the world. This simple ritual ties together everything we've covered — and now it's time to pull it all into one complete five-minute routine.
What Your Granddaughter's Generation Gets Right
Here's something beautiful you might not have noticed. Your granddaughter's generation is obsessed with dewy skin, cream blushes, skin-first routines, and barely-there foundation. They've thrown out their powder compacts. They tap everything on with their fingers. Sound familiar? Everything we've been talking about — the exact approach that flatters mature skin most — is what twenty-somethings are calling the hottest trend in beauty right now. You're not catching up. You're arriving at the same destination from different directions.
Next time you're with your daughter or granddaughter, ask what's in her makeup bag. You might be surprised how much you suddenly have in common — and how much fun it is to share. Speaking of everything coming together, let's build your complete five-minute routine.
Your Five-Minute Face After 60
Here's your complete routine — try it tomorrow morning. First, moisturize and apply primer, smoothing everything with your fingertips. That takes 90 seconds. Next, dot tinted moisturizer across your forehead, cheeks, and chin, then blend with warm fingers for 60 seconds. Tap cream blush along your cheekbones toward your temples — 30 seconds. Fill sparse brow areas with light, feathery strokes and set with gel — 45 seconds. One single coat of tubing mascara, wiggled from the roots — 30 seconds.
Finally, swipe on a creamy satin lipstick — 15 seconds. Five minutes. Six products. Everything we've covered, distilled into a routine that feels effortless and looks incredible. That's your new morning. And there's one last thing you deserve to hear.
You Deserve to Feel Beautiful Every Day
You've spent a lifetime earning that face. Every laugh line came from joy. Every crease around your eyes came from years of smiling at people you love. Makeup after 60 was never about covering any of that up — it's about letting your real beauty come through without anything fighting against it. You now know what works, why it works, and exactly how to do it. That's powerful. You deserve to feel beautiful not just on special occasions, but on ordinary Tuesdays.
So experiment. Play. Enjoy your reflection again. And if this helped you see yourself differently, share it with a friend who might need to hear it too. You are seen, you are beautiful, and your best makeup days are just beginning.Disclaimer: This story is based on real events. However, some names, identifying details, timelines, and circumstances have been adjusted to protect the privacy of the individuals involved. The images in this article were created with AI and are illustrative only. They may include altered or fictionalized visual details for privacy and storytelling purposes